Are you tired of a cluttered storage shed? A good shed roof protects your stuff and makes your outdoor space look better. But, how do you start building a strong and reliable shed?
In this guide, we’ll cover the key steps for shed roof framing, roofing techniques, and making your roof waterproof. Whether you’re experienced or new to DIY, you’ll get helpful tips and insights to complete this project confidently.

Thousands of projects to build!! Visit now: https://t.co/IHQnX5dry7#ashley #airtel #arneslot #brian #babar #charli #dollyparton #Europe #FrankOcean pic.twitter.com/ZN1yK69WgO
— easydone (@easydone4u) February 15, 2025

Building a shed roof can cost between $3,000 and $4,000. Replacing a shed roof might cost $150 to $750. Remember to budget 5–10% for your shed project. The cost of materials depends on your shed’s size and design.
When choosing roofing materials, you have options like asphalt shingles, metal, and slate. Always check local building rules and figure out how much timber you need for walls, floor, roof, and foundation.
Key Takeaways
- Understand the essential steps of shed roof framing and roofing techniques
- Learn how to waterproof your shed roof for maximum protection
- Discover the various roofing materials available for your shed
- Gain insights into the costs associated with building a shed roof
- Familiarize yourself with local building regulations and material calculations
Planning Your Shed Roof
Building a storage shed means focusing on the roof first. A good roof protects your stuff and makes your shed look and work better. Before you begin, plan your roof well.
Choosing the Right Roof Style
There are many shed roof styles to pick from. Each has its own benefits and looks great. Here are some popular ones:
- Gable roof: A timeless choice with lots of storage and easy to build.
- Lean-to or shed style roof: Affordable and quick to set up, perfect for sheds and houses.
- Saltbox roof: Looks charming, great for cold weather, but might limit attic space.
- Gambrel roof: Offers lots of storage but needs extra support.
- Hip roof: Best for snowy areas, but costs more due to its design.
Determining the Roof Pitch
The roof pitch, or slope, is key when planning your shed roof. Most roofs need a 3:12 (14 degrees) pitch for good drainage and to avoid leaks. But, a 7:12 (about 30 degrees) pitch is common for sheds. A pitch under 3:12 might need special materials to keep water out.
Calculating Material Requirements
To figure out what materials you need, think about a few things:
- Shed size: Measure your shed to find out how much roof you need.
- Roof pitch: A steeper roof needs more material.
- Roofing material: Pick from asphalt shingles, metal, roll roofing, or wood shingles/shakes.
By planning your roof style, pitch, and materials carefully, you’ll build a strong and good-looking roof. It will protect your shed for many years.
Gathering Essential Tools and Materials
Before starting your shed roofing project, make sure you have all the tools and materials ready. Having everything you need will make the building process easier and faster. Here’s a list of the essential tools and materials for your shed roof:
| Tools | Materials |
|---|---|
|
|
When picking your shed roof materials, think about durability, cost, and looks. You can choose from shingles, metal panels, or roofing membranes. Each has its own pros and cons, so pick what fits your budget and style.
For a 10 x 20-foot storage shed with a peaked roof, you’ll need nine roof trusses and two rafters. The roof will have a 10:12 pitch, which is quite steep. To save money, you can use leftover roof sheathing to make metal gussets if you can’t find manufactured ones.
A mitre saw can be incredibly helpful when cutting various angles for the roof trusses, making the process much easier and more precise.
Remember the special details in your shed plans, like installing two roof vents on the front and back gable rafters. These details can really help your shed roof last longer and work better.
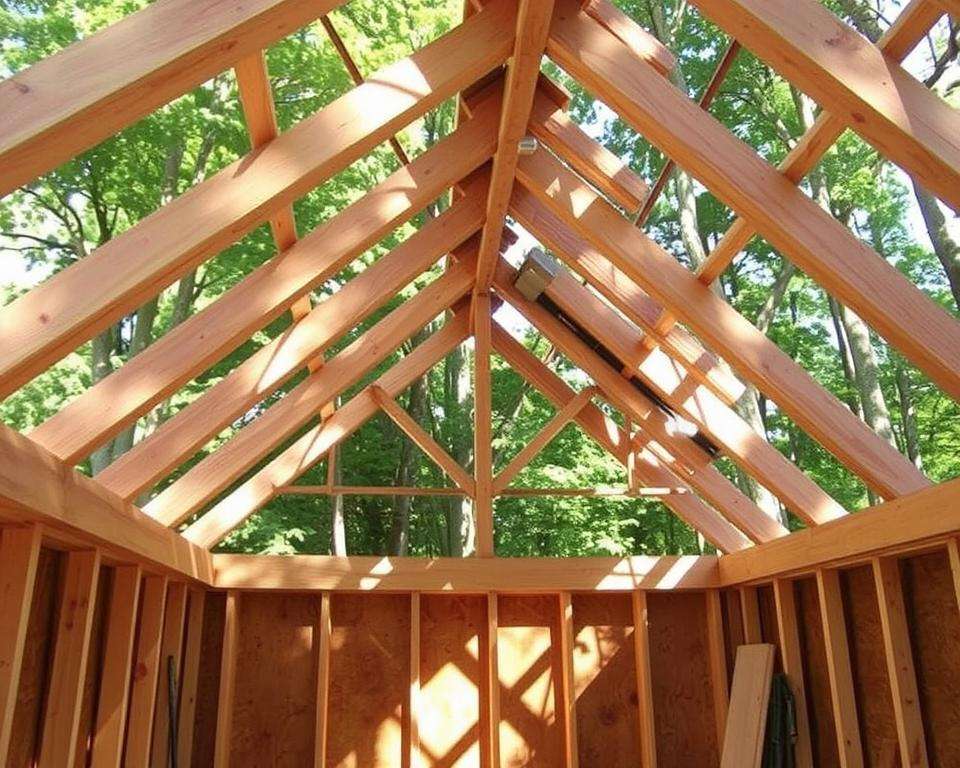
Constructing the Roof Frame
Building a strong roof frame is key for your shed’s life and use. You can choose between rafters or trusses for your roof. Both need careful planning and doing to make a solid, weather-proof roof.
Building Rafters or Trusses
Rafters and trusses are the main parts of your shed roof. For rafters, use 2×4 boards cut to the right length and angle. A 12/12 pitch, or 45-degree angle, is good for drainage and looks nice. Place rafters 16 inches apart and attach them to the shed walls.
Or, you can use pre-built shed roof trusses. They’re easier to put up. Trusses are made to hold the roof’s weight and can be adjusted to fit your shed. Just follow the maker’s guide for how to install and space them.
Installing the Ridge Board
If you’re building rafters, you’ll need a ridge board at the roof’s peak. This board is horizontal and supports the rafters’ ends. Cut it to size and nail it to the rafters with 3.5″ framing nails.
| Material | Purpose |
|---|---|
| 2×4 boards | Framing the roof |
| 7/16″ sheathing | Covering the roof frame |
| 3.5″ framing nails | Securing rafters and ridge board |
| Hurricane ties | Strengthening the connection between rafters and walls |
Attaching Hurricane Ties
To make your shed roof strong against wind, use hurricane ties. These metal pieces help the rafters or trusses stick to the shed walls. Follow the maker’s guide for how to use 1.5″ nails or screws. This step is very important, mainly in places with bad weather.
By using these shed roof framing techniques and the right materials, you’ll make a strong roof for your shed. Always put safety first and check local building rules before you start.
Installing Roof Sheathing
Now that your shed’s roof frame is built, it’s time to install the roof sheathing. This step is key for your shed’s strength and a good base for the roof. We’ll show you how to pick the right sheathing and how to cut and fit it.
Choosing the Right Sheathing Material
For roof sheathing, you can choose plywood or oriented strand board (OSB). Both are strong and durable, great for your shed roof. Plywood fights moisture well and has a smooth surface. OSB is cheaper but works just as well. Think about your budget and the weather where you live.

Cutting and Fitting Sheathing Panels
First, measure your roof frame accurately. For a 10×20-foot shed, you’ll need several 4×8-foot sheets. Use a circular saw to cut them to fit perfectly against the rafters or trusses.
Start at the roof’s bottom edge and work up. Use nails or screws to attach the panels to the rafters or trusses. Space them 6 to 8 inches along the edges and 12 inches in the middle. Stagger the joints for extra strength and leave a small gap for expansion.
Plywood sheets are heavy, so you might need two to three people to install them safely. Work slowly and make sure each panel is right and secure before moving on. With careful work, your roof sheathing will be ready for the roofing material.
Applying Drip Edge and Felt Paper
To protect your storage shed roof from the weather, installing drip edge and felt paper is key. Drip edge directs water away, and felt paper adds extra protection under the roof material.
Installing Drip Edge
Start by putting drip edge along the roof’s edges and corners. Make sure to overlap drip-edge pieces by at least 2 inches. Use roofing nails to secure it, keeping the line straight for a clean look.
A forum with 5 people talked about roofing a shed in snowy areas. They stressed the importance of drip edge installation. One person said the waterproof shingle underlayment should extend 1/2 inch over the drip edge for best results.
Laying Down Felt Paper
After installing the drip edge, it’s time for the felt paper. Felt paper comes in 15# or 30# weights, with 15# being easier but more likely to tear. Most building codes require 30-pound roofing felt.
Begin at the roof’s edge and move up, overlapping each layer by at least 4 inches. At the roof’s peak, the felt should overlap by at least 8 inches on each side. When the roof meets a wall, lap the felt up 4 inches if you can. Use plastic-capped roofing nails every 12 inches, or staples, with at least three per foot.
The roll of felt paper usually contains the manufacturer’s installation instructions, which should be followed closely for the best results.
With a helper, it takes several hours to install drip edge, ice guard, and roofing felt on a medium-sized roof. Be careful on shed roofs to avoid accidents from poorly secured felt paper.
How to Build a Storage Shed Roof: Step-by-Step Instructions
Building a storage shed roof is key to a durable, protective space for your outdoor stuff. This guide is for DIYers and beginners alike. It will help you install a shed roof step by step, making your project a success.
First, plan your shed roof well. Think about the style and pitch that fit your needs and taste. A 12×12 shed costs between $5,760 and $10,800. A 10×10 shed is about $2,200, based on materials and finishes. For a budget-friendly option, a simple shed can cost as little as $1,000.

Next, get the right tools and materials. You’ll need pressure-treated lumber, concrete pavers, poured concrete, and asphalt shingles. Also, metal drip edge, wood siding, plywood, glass, and fasteners like galvanized nails and screws. You’ll need about 233 square feet of siding and 8 sheets of plywood for the roof.
Now, start building the roof frame. This includes making rafters or trusses, installing the ridge board, and adding hurricane ties for stability. Make sure to measure carefully and fasten everything securely.
Then, put on the roof sheathing by cutting and fitting plywood panels. A good fit is key for a strong roof base. After that, add drip edge and felt paper to protect against moisture and enhance durability.
Lastly, install the roofing material, which is asphalt shingles. You’ll need about 150 square feet of shingles. Follow the manufacturer’s instructions and ensure each shingle is properly placed and secured.
Remember to follow local building rules and permits during the installation. In Utah, sheds under 200 square feet not connected to utilities might not need a permit. Always check with your local authorities to comply.
With hard work and focus, you can finish your shed roof in about 4 days. The result will be a strong, weather-resistant structure that keeps your belongings safe. Enjoy the pride of a job well done!
Installing Roofing Material
When choosing a shed roof, you can pick from asphalt shingles, metal roofing, or roll roofing. Asphalt shingles are the most common and affordable, costing about $115 per 100 square feet. First, figure out your shed’s roof size and add 10% for waste and overlaps. Remember, one “square” is 100 square feet.
Before you start, make sure your roof frame is in good shape. Place your ladder at a 75-degree angle for safety. Begin by laying down a recommended underlayment, like GAF FeltBuster Synthetic Roofing Underlayment. Overlap each row by 2 inches and nail down every few feet.
Installing Asphalt Shingles
For asphalt shingles, use GAF Royal Sovereign Charcoal Algae Resistant 3-Tab Roofing Shingles. Start with a starter strip that overhangs the drip edge by 1/4 inch. Snap lines every 5 inches horizontally and 6 inches vertically for straight rows. The first row should overhang by 1/2 inch.
Secure each shingle with four nails, spread evenly. As you go up, stagger the shingle cutouts to block water. In snowy areas, add an ice and water shield along the eaves to prevent ice dams.
| Skill Level | Cost per 100 sq. ft. | Estimated Time | Waste & Overlap |
|---|---|---|---|
| 3 out of 5 (Moderate) | $115 | 4 hours (varies) | 10% |
Installing Metal Roofing
Metal roof installation requires attaching panels to sheathing with the right fasteners. Make sure panels overlap and seal gaps with sealant or closure strips. Always follow the manufacturer’s installation guide.
The American Roofing Company, serving the Salt Lake area for 68 years, advises DIYers to focus on safety and take their time with shed roofing projects.
With the right tools, materials, and care, you can put a strong and good-looking roof on your shed.
Ventilation and Insulation Considerations
When building a storage shed roof, it’s key to think about ventilation and insulation. Good ventilation stops heat from building up in summer. Without it, the shed can get 20-25 degrees hotter than outside.
Poor ventilation also leads to too much moisture. This can cause mold and mildew, which are bad for your health. They can make you feel sick with headaches and breathing problems.
To keep air moving well, put small vents at each end of the shed. For bigger sheds, you might need more vents or different ways to let air in. Wall vents are cheap and work well as intake or exhaust vents.
Ridge vents cost between $2 to $10 per foot and keep critters out. Solar-powered fans are energy-saving and have a thermostat. Shed windows let in light and air but might cut down on storage space.
For insulating your shed roof, you can use Rockwool, fiberglass, or foam boards. Use a 6-mil plastic sheeting as a vapor barrier. Add vents like soffit, ridge, or gable vents for air flow.
Use Tuck Tape to seal the vapor barrier and fix any tears in the plastic. Insulating a shed roof can take a weekend for a DIYer. It’s worth it for the comfort, energy savings, and protection of your stuff.
Think about your shed’s size, framing, and how much insulation you need. For example, a 16′ x 26′ shed might need R-13 or R-15 Rockwool insulation. This depends on the shed’s size and how well it’s framed.
Finishing Touches and Maintenance
Now that your shed roof is done, it’s time to add the final touches. Make sure it lasts long with shed roof weatherproofing and upkeep. These steps will protect your investment and keep your shed looking great for years.
Sealing and Weatherproofing
To stop leaks and moisture harm, seal all roof openings well. Use a caulking gun for a tight seal around vents, skylights, and flashing. Also, add a protective coating or paint to fight off weather and UV damage.
Regular Maintenance Tasks
Keeping your shed roof in good shape is key. Here are some shed roof maintenance tasks to do regularly:
- Check the roof yearly for damage, loose shingles, and debris.
- Keep gutters and downspouts clean to avoid water buildup and clogs.
- Trim tree branches to avoid damage from falling debris.
- Fix any damage or leaks quickly to keep the roof strong.
A well-maintained shed roof protects your stuff, adds value, and looks better.
By following these steps, your shed roof will stay strong and weather-ready for years.
Conclusion
Building a storage shed roof is a DIY project that can make you feel proud and add value to your home. This guide will help you plan, gather materials, build the frame, and finish your shed roof. It’s important to pick the right roof style and calculate materials well.
Remember to use the right tools and techniques for a strong and weatherproof roof. When starting your project, think about ventilation, insulation, and maintenance. This will help your shed last longer and work better.
Experts like those at Wright Sheds say a solid frame and the right materials are key. They also stress the importance of proper water runoff.
With good planning and a focus on details, you can build a beautiful shed. It will be a place you’ll enjoy for many years. Start your project and see the joy of having your own outdoor space.