Ever wondered what makes a woodworking master different from a beginner? It’s not just about skill. It’s also about the quality and choice of hand tools. Knowing the basics of hand tools can make your woodworking projects stand out.
Woodworking doesn’t have to cost a lot. You don’t need to buy all tools at once. Think of a list of tools as goals, not things you must have right away. This guide will help you choose the right tools for your projects.

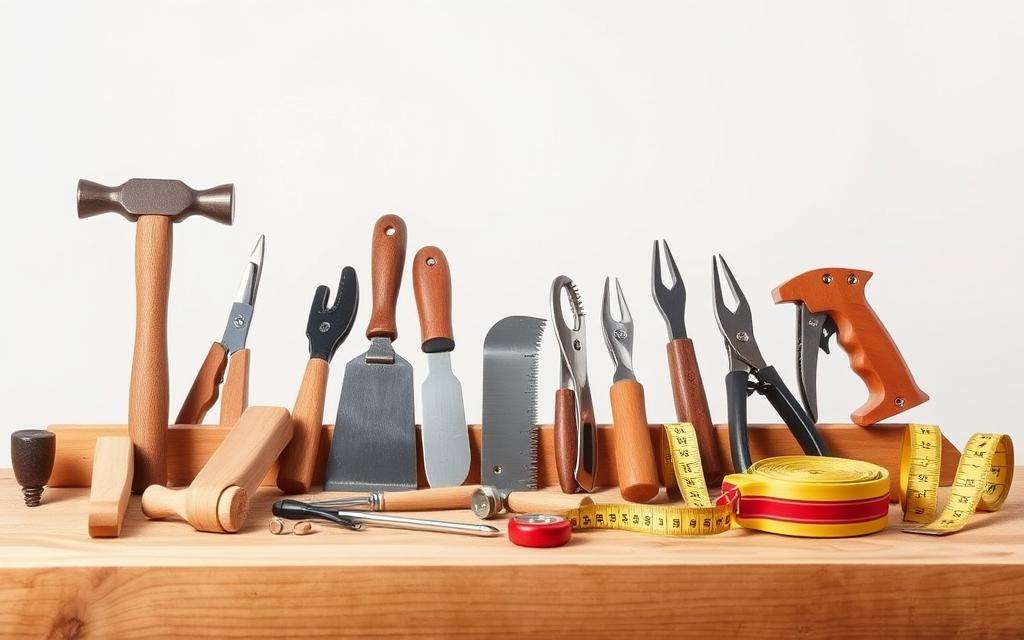
We’ll look at tools like the jack plane and chisels. These tools will be your friends in making beautiful wood creations. You’ll learn how to pick the right tools, use them, and keep them in top shape.
Key Takeaways
- Essential hand tools for beginners include a jack plane, hand saw, chisels, and marking tools
- Quality tools can significantly impact skill development and project outcomes
- Vintage tools can offer value, but may require additional investment for tuning
- Regular maintenance and sharpening are key for tool performance
- Investing in a good workbench with dual vises is essential for woodworking success
Essential Hand Tools for Getting Started
Starting your woodworking journey is exciting. But, having the right tools is key. Let’s look at the essential hand tools you’ll need to start your hobby without spending too much.
Understanding Basic Tool Requirements
Woodworking starts with about 20 essential hand tools. These include woodworking chisels, a jack plane, hand saws, and marking tools. Chisels are very important, as they’re used more than any other tool.
Budget Considerations for Beginners
You don’t have to spend a lot to start. Many quality tools are affordable. For example, panel saws can cost as little as $5 each. A set of vintage bevel edge bench chisels might cost around $10. Coping saws usually cost under $20.
| Tool | Approximate Price |
|---|---|
| Marking Knife | $17.54 |
| Marking Gauge | $11.77 |
| Square | $12.99 |
| Ruler or Tape Measure | $8.97 |
Quality vs Cost Trade-offs
Quality is important, even when watching your budget. A solid wooden workbench is a good investment. For chisels, start with 1/4-inch and 3/8-inch mortise chisels. Quality tools at the start can make a big difference in your projects.
As you get better, you might want to try woodturning tools. But first, focus on mastering these basic hand tools. This will help you build a strong foundation in woodworking.
Hand Tools Woodworking: A Complete Guide
Start with a beginner’s kit that has 5 key tools. These are a hand saw, measuring tools, block plane, chisel set, and clamps. As you get better, you’ll learn about 6 hand tool categories.
Chisels are the most versatile tools for woodcarving. They’re great for cutting, shaping, and making joints. Hand planes are essential for smooth surfaces. For drilling, use hand drills and brace and bit sets.
| Tool Category | Essential Tools | Primary Use |
|---|---|---|
| Measuring and Marking | Try squares, marking gauges | Maintaining square cuts, creating parallel lines |
| Cutting | Hand saws (crosscut and rip) | Making specific cuts in wood |
| Shaping | Chisels, hand planes | Precision cutting, smoothing surfaces |
| Joinery | Clamps | Holding pieces together during glue-up |
| Boring | Hand drills, gimlets | Creating precise holes |
Choosing hand tools woodworking connects you to tradition. 60% of woodworkers prefer them for small, detailed projects. This approach helps you understand wood better and learn skills faster.
Mastering the Jack Plane: Your First Essential Tool
The jack plane is a key tool in woodworking. It’s 12″ to 15″ long, perfect for making boards flat and smooth. Let’s explore how to pick, care for, and use this vital tool.
Choosing Between Vintage and New Planes
You can choose between vintage or new jack planes. Vintage Stanley No. 5 planes from 1902 to 1924 are highly valued. They cost between $30 to $40 on eBay and are often of better quality.
New planes are also an option. But, avoid cheap ones from Harbor Freight, priced at $14.99. Instead, choose a reputable brand for long-term use.
Proper Tuning and Maintenance
A well-tuned jack plane is essential. Many woodworkers face issues with planes not set up right. To keep your plane in top shape:
- Regularly clean and oil moving parts
- Keep the sole flat and true
- Sharpen the blade often
Basic Planing Techniques
Learning basic planing techniques will improve your woodworking. Here are the first steps:
- Set the blade depth correctly
- Hold the plane at the right angle
- Push with consistent pressure
- Work with the grain of the wood
Practice is key. As you get better, you’ll feel more comfortable with the tool. You’ll achieve smoother surfaces on your projects.
| Aspect | Vintage Planes | New Planes |
|---|---|---|
| Quality | Generally higher | Varies by brand |
| Cost | $30-$40 (eBay) | $50-$200+ |
| Availability | Limited | Readily available |
| Setup required | Often needs tuning | Usually ready to use |
Hand Saws: Types and Selection Guide
Hand saws are key tools in woodworking. There are many types, and picking the right one is important. Let’s dive into the world of hand saws and find the perfect one for you.
Panel Saws vs Regular Hand Saws
Panel saws and regular hand saws have different uses. Panel saws are shorter and great for precise cuts in small pieces. Regular hand saws, longer at 24-26 inches, handle bigger lumber well. Both come in rip and crosscut versions, with specific tooth designs for different cuts.
Understanding Tooth Geometry
Tooth geometry is key to a saw’s performance. Rip saws have fewer, larger teeth for fast cuts along the grain. Crosscut saws have more, smaller teeth for smooth cuts across the grain. Higher TPI means smoother cuts but slower speed. A Japanese Ryoba saw is versatile, with both rip and crosscut teeth on one blade.
| Saw Type | TPI Range | Best Use |
|---|---|---|
| Rip Saw | 4-7 | Cutting with the grain |
| Crosscut Saw | 8-11 | Cutting across the grain |
| Japanese Ryoba | Varied | Versatile for both rip and crosscut |
Maintenance and Sharpening
Proper care extends your saws’ life. Store them in a dry place to avoid rust. Regular cleaning and oiling keep blades sharp. For sharpening, you might need an expert or specialized sharpening tools. Well-maintained saws make your work easier and more fun.
Hand saws are vital, but don’t overlook woodworking clamps. They’re essential for holding your work steady while sawing. With the right saws and clamps, you’ll be ready for many woodworking projects.
Woodworking Chisels: Your Core Collection
Woodworking chisels are key tools for serious woodworkers. A good set of chisels can make your projects better, allowing for detailed cuts. Let’s look at what makes up a solid chisel set.
A basic set usually has sizes from 1/4″ to 1″. Beginners should start with 1/4″, 3/8″, 1/2″, 3/4″, and 1″ chisels. These sizes help with most woodworking tasks, from small joints to big surfaces.
When picking chisels, think about quality and price. The Narex 4-piece Chisel Set is a good choice for its mix of affordability and durability. For those wanting top-notch tools, there are bench chisels in sizes from 1/4-inch to 2 inches. They offer more options for complex projects.
Keeping your chisels sharp and well-oiled is key. Regular sharpening and oiling will make them last longer and work better. Many woodworkers use 3-in-One Multi-Purpose Oil to keep their chisels rust-free and ready to go.
“A sharp chisel is a safe chisel. Never underestimate the importance of maintaining your tools.”
As you get better with your chisels, you’ll see they’re great for wood carving too. They help with detailed designs and fine joinery, becoming the heart of your woodworking tools.
| Tool | Average Price | Recommended for |
|---|---|---|
| Chisel Set | $62.99 | General woodworking |
| Mallet | $29.99 | Controlled chisel use |
| Card Scraper | $17.49 | Smooth finishing |
Investing in quality chisels now will save you money later. With the right care and skill, your chisels will last for many years. They’ll help you make beautiful, precise woodwork with ease.
Back Saws for Precision Joinery
Back saws are key tools for making tight joints in woodworking. They come in different types, each for a specific job. Let’s dive into the world of back saws and find out how to pick and care for them.
Different Types of Back Saws
There are many back saws, each with its own features:
- Dovetail saws: Great for making fine dovetail joints
- Tenon saws: Best for cutting tenons and big joinery
- Carcass saws: Good for many joinery tasks
- Half back saws: An old design with new uses

Choosing Your First Back Saw
For beginners, start with a carcass saw. It’s good for many tasks like dovetails and tenons. When picking your first back saw, think about these things:
- Tooth count: More teeth per inch (TPI) means finer cuts
- Saw length: Longer for big projects, shorter for small details
- Handle comfort: It should fit your hand well for control
Care and Maintenance Tips
To keep your back saw in great shape:
- Clean it after use to stop rust
- Store it dry, hanging to avoid warping
- Sharpen it often for better cuts
- Put a light oil coat to stop corrosion
With right care, your back saw will last a long time. Remember, using these precision joinery tools gets better with practice. Start with simple joints and get better at more complex ones as you get more skilled.
“A well-maintained back saw is a woodworker’s best friend for creating precise, beautiful joinery.”
Marking and Measuring Tools
Precision is key in woodworking, and it’s even more important when making cabinets. The right marking and measuring tools can make a huge difference. Let’s look at some essential tools for cabinet making that ensure accuracy and consistency.
Marking Gauges and Their Uses
Marking gauges are essential for precise layout work. They help you draw parallel lines, mark joints, and set depths. When picking a marking gauge, think about wheel gauges for clean lines or traditional pin gauges for versatility.
Squares and Measuring Devices
Squares are key tools in cabinet making. A combination square is great for checking angles and measuring. For bigger projects, a framing square is useful. And don’t forget a reliable tape measure for quick measurements.
Pencils and Marking Tools
While carpenter’s pencils are common, look at specialized options. The Pica Dry Longlife Automatic Pencil is durable and precise. For dark woods, a white pencil or chalk is better for visibility. Clear markings mean accurate cuts and better joints.
| Tool | Primary Use | Recommended for |
|---|---|---|
| Marking Gauge | Scribing parallel lines | Mortise and tenon joints |
| Combination Square | Checking angles, measuring depths | All-purpose woodworking |
| Framing Square | Large-scale layout work | Cabinet framing |
| Pica Dry Longlife Pencil | Precise marking | Detailed cabinetry work |
Essential Woodworking Clamps
Woodworking clamps are key tools in any workshop. They keep pieces in place during various tasks. As you grow in skills and projects, so should your clamp collection.
Parallel-jaw clamps are essential. A good shop might have 12 of the 26-inch type. They range from 12 to 50 inches and offer more pressure and depth than F-style clamps.
F-style clamps are affordable and versatile. You’ll often use them, including the smaller sizes. Deep-reach F-style clamps are great for big projects. For quick holds, trigger clamps are perfect because they’re easy to use with one hand.
Pipe clamps, made from 3/4-inch pipes, are rigid for big tasks. Hand screw clamps are excellent for both horizontal and vertical clamping. Spring clamps are good for light tasks due to their limited pressure.
For specific tasks, consider these clamps:
- Band clamps for complex miter joints
- Right angle clamps for 90-degree precision
- Panel clamps for large furniture assemblies
- Toggle clamps for repetitive tasks
| Clamp Type | Best Use | Typical Quantity |
|---|---|---|
| Parallel-jaw | Large projects | 12-15 |
| F-style | Versatile use | 20+ |
| Pipe clamps | Long spans | 6-8 |
| Hand screw | Odd shapes | 8-10 |
| Spring clamps | Light-duty | 15-20 |
Your clamp collection should match your woodworking needs. Begin with versatile clamps and add specialty ones as needed.
Sharpening Tools and Maintenance Equipment
Keeping your woodworking tools sharp is key to clean cuts and quality work. Let’s dive into sharpening tools and techniques to keep your tools in top shape.
Sharpening Stone Selection
Choosing the right sharpening stones is vital. You have traditional water stones and modern diamond plates. Beginners should start with a combination stone, like #1000 and #6000 grits. The lower the grit number, the coarser the stone.

Basic Sharpening Techniques
Learning basic sharpening techniques takes time. Begin with a coarse grit to remove nicks, then move to finer grits for a sharp edge. For planes and chisels, keep the sharpening angle consistent. Saws need a different method, using a saw file to sharpen each tooth.
Tool Maintenance Schedule
Regular maintenance keeps your tools in top condition. Here’s a simple schedule:
| Tool | Frequency | Maintenance Task |
|---|---|---|
| Chisels | Weekly | Hone edge |
| Planes | Monthly | Sharpen blade, oil moving parts |
| Saws | Every 3 months | Clean, check for rust, sharpen if needed |
| All tools | After each use | Clean and store properly |
Proper tool care is more than sharpening. Clean your tools after each use and store them in a dry place to prevent rust. With the right sharpening tools and regular care, your woodworking gear will last for years. For more tips on essential tools, check out our guide for beginners.
Specialty Tools for Advanced Projects
As you get better at woodworking, you’ll want to try more complex projects. That’s when you need specialty tools. Let’s look at some advanced tools that can improve your skills.
Woodturning tools are key for making beautiful bowls and spindles. You’ll need gouges, skew chisels, and parting tools. Each tool has a special job in shaping wood on a lathe. Woodcarvers tools, on the other hand, are great for adding detailed designs to your projects. They come in different shapes and sizes, letting you carve fine patterns and textures.
A dovetail jig is a popular tool for making strong, attractive joints quickly and evenly. It’s perfect for drawer making and fine cabinetry. Another tool worth considering is the track saw. It cuts with precision and can save up to 20% of material.
If you’re into veneering, a veneer press is essential. It applies even pressure, preventing bubbles and giving you a professional finish. Detail sanders are also great, as they get into tight spaces and are good for furniture restoration.
| Specialty Tool | Primary Use | Efficiency Boost |
|---|---|---|
| Dovetail Jig | Joint Creation | Speed and Consistency |
| Track Saw | Precision Cutting | 20% Material Optimization |
| Router Lift | Joinery | 30% Setup Time Reduction |
| Oscillating Multi-tool | Detailed Sanding | Used in 25% of Finishing Tasks |
Using these specialty tools can make your projects 30% more efficient. They might cost more at first, but many woodworkers see a 15-25% return on investment. This is in time savings and better quality for advanced projects.
Safety Equipment and Best Practices
When you work with wood carving tools, safety is key. Woodworking can be risky, with dangers like cuts and losing a limb. Here are important safety steps to protect you.
Respiratory Protection
Wood dust can harm your eyes, nose, and throat. It’s a known cancer risk. The GVS Elipse NIOSH P100 respirator is a great choice. It blocks harmful particles, keeping your lungs safe while you carve wood.
Eye and Ear Protection
Goggles protect your eyes from flying debris. Woodworking can be very loud, with sounds over 85 decibels. Good earmuffs or earplugs are key to prevent hearing loss.
Workshop Safety Guidelines
Keep your workspace clean and safe from tripping. Make sure all tools are sharp and well-kept. Dull tools can cause accidents. Use push sticks with power tools to protect your hands. Always wear the right clothes – nothing loose that could get caught.
| Safety Measure | Benefit |
|---|---|
| Proper Equipment Grounding | Prevents electrical shocks |
| Local Exhaust Ventilation | Reduces airborne sawdust |
| Regular Tool Maintenance | Lowers risk of accidents |
Remember, safety is more than just gear. Stay alert while using tools and never leave machines running alone. By following these tips, you can greatly lower your risk of accidents and enjoy woodworking safely.
Conclusion
Starting your hand tools woodworking journey? You now know the key tools and techniques to master. Tools like the jack plane and back saw are essential. They help bring your projects to life.
Building a good woodworking set is important. You’ll need bench chisels, a quality square, and a marking gauge. For advanced projects, cabinet making tools are a must. They help create stunning pieces for your home.
Hand tools offer a precision and beauty machines can’t match. Using a dovetail saw or hand plane adds unique character to your work. So, grab your tools and start making beautiful wooden pieces that will last for generations.