Ever wondered how to make your gatherings unforgettable without spending a lot? A custom entertaining space could be the answer. Making your own pallet furniture brings together personality and function in a way store-bought items can’t.
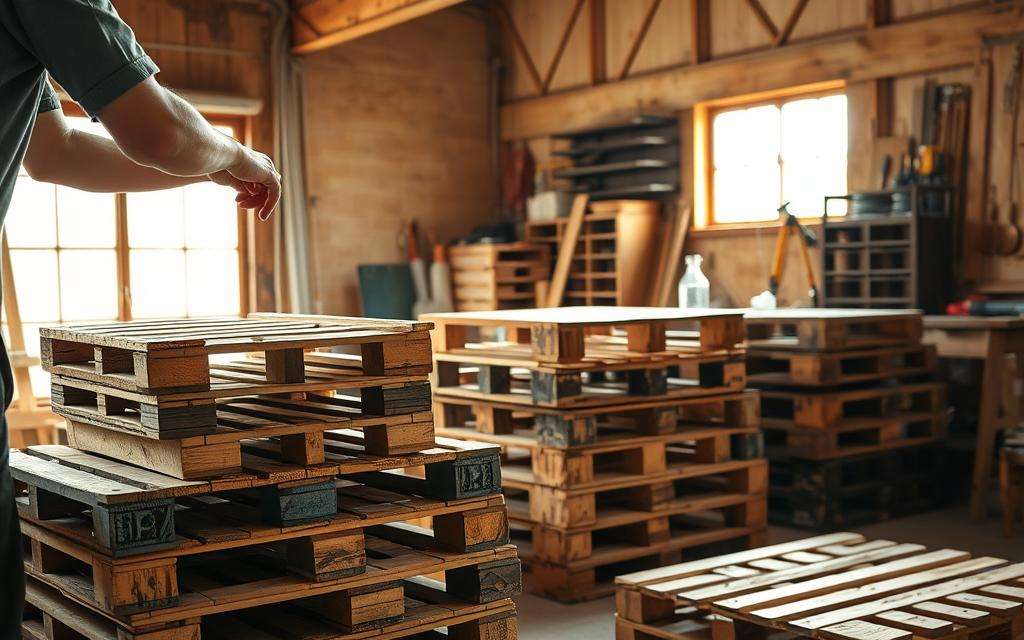
Picture hosting friends in your backyard with a unique piece you made yourself. This project turns old shipping materials into a stylish centerpiece for any event. The herringbone-patterned top adds elegance to the rustic look of repurposed wood.
The charm of learning how to build a DIY wood pallet bar is its flexibility. You can adjust the size to fit any space—be it a cozy corner, a patio spot, or an empty room. With basic tools and a couple of weekends, you’ll have a piece that tells a story and brings people together.
Key Takeaways
- Transform ordinary gatherings into memorable experiences with a custom bar
- Repurpose shipping pallets into stylish, functional furniture
- Create a unique conversation piece that showcases your craftsmanship
- Customize dimensions and design to fit your specific space
- Add value to your home with sustainable, budget-friendly materials
- Complete this project with basic tools and a couple of weekends

Why Build Your Own Wood Pallet Bar
When commercial bars are too expensive or don’t last, making your own wood pallet bar is a smart choice. Many of us have looked at prefabricated bars only to find they’re too pricey or can’t handle bad weather. We faced this problem when looking for a bar that could handle Houston’s rain.
Building your own pallet bar lets you control the design and how durable it is. You can make sure the parts that get the most use are strong. You can also pick finishes that won’t fade in the sun and make it fit perfectly in your space. Plus, you can show off your personal style.

Benefits of DIY Pallet Furniture
The rise in pallet furniture is more than a trend. It’s about making your home look good and being kind to the planet. By making furniture from pallets, you’re giving old materials a new life instead of throwing them away.
DIY pallet projects have many benefits:
- Customization freedom – Change sizes, features, and finishes to fit your needs
- Authentic character – Each piece has unique wood grain and weathering that store-bought furniture can’t match
- Conversation starter – Your guests will be impressed by your creativity
- Skill development – You’ll get better at woodworking with each project
Pallet wood’s rustic look fits many home styles, from industrial to modern bohemian. The wood’s natural look and feel add real charm to your space.
Cost Savings Compared to Store-Bought Bars
One big reason to make your own pallet bar is the money you save. Store-bought bars can cost $500 to $2,000 or more. But, a DIY pallet bar can be made for $50-200, depending on how complex it is.
Here’s how much you can save:
| Item | Store-Bought Cost | DIY Pallet Cost | Potential Savings |
|---|---|---|---|
| Basic Bar Structure | $800-1,200 | $0-50 (pallets) | $750-1,150 |
| Countertop | $200-500 | $30-100 | $170-400 |
| Storage Features | $150-300 | $20-50 | $130-250 |
| Finishing Materials | Included | $30-80 | Variable |
Many companies give away pallets for free to save on disposal costs. Even if you buy pallets, they’re very affordable. The main costs are for hardware and finishes, but these are much less than buying a pre-made bar.
Your DIY bar will also last longer than many commercial ones. By choosing good materials and protecting them from the weather, your bar can last for years. This was a problem we had with prefabricated bars for Houston’s weather.
With DIY bar plans and basic tools, you can make a bar that’s both useful and beautiful. It would cost a lot more if you bought it ready-made. The joy of making something yourself? That’s the best part of every pallet project.
Materials and Tools You’ll Need
To turn wooden pallets into a cool home bar, start by gathering the right stuff. Building a DIY wood pallet bar is a fun backyard project. Having the right tools saves you from last-minute trips to the store and makes building easier.
Essential Wood Pallets and Lumber
Your reclaimed wood crafts project needs quality pallets. For a standard bar, you’ll need 8-10 pallets in good shape. Our project used 9 pallets, arranged like Legos.
Choose pallets marked “HT” (heat-treated) instead of “MB” (methyl bromide). MB-treated pallets have harmful chemicals. Heat-treated pallets are safer for your home bar and rustic home decor.
You’ll also need extra lumber for support:
- Seven 2x4x8 treated wood beams (4 for vertical side pillars, 2 for horizontal beam support)
- Plywood sheets for countertops (if not using pallet wood)
- More lumber for shelving or decorations
The amount of materials needed depends on your diy bar plans. A bigger bar needs more pallets and lumber. Draw your design to figure out how much you’ll need.

Required Tools List
Having the right tools makes your woodworking ideas come to life faster. You don’t need top-notch tools, but some are key for pallet wood projects.
| Tool Category | Essential Items | Purpose | Alternatives |
|---|---|---|---|
| Power Tools | Drill, Circular saw, Sander | Assembly, cutting, finishing | Hand saw (more labor-intensive) |
| Cutting Tools | Jigsaw, Reciprocating saw, Table saw | Detailed cuts, disassembly, straight cuts | Manual cutting tools (slower) |
| Hand Tools | Hammer, Pry bar, Measuring tape | Assembly, disassembly, measuring | No practical alternatives |
| Measuring Tools | Level, Speed square, Carpenter’s square | Ensuring straight, level construction | DIY plumb line (less accurate) |
| Safety Equipment | Gloves, Safety glasses, Dust mask | Personal protection | Not recommended to skip |
Tools like wood clamps, a pneumatic nailer, and a chalk box make your project easier. Don’t forget wood glue, screws, nails, and drill bits for your materials.
Optional Materials for Customization
Make your woodworking ideas unique. While basic materials are enough, adding extras can make your bar stand out.
Decorative elements like rope around the posts add a nautical touch. This simple step can change your bar’s look and fit your outdoor theme.
Lighting changes the feel of your bar area. We used café lights and nautical-style lights. Other options include:
- LED strip lighting under counter edges
- Solar-powered fixtures for outdoor bars
- Pendant lights above the serving area
- Battery-operated puck lights for shelving areas
Personalized signs add character to your rustic home decor. We made a custom sign from a $5 piece of wood. Consider signs with your family name or a clever phrase.
For the countertop, think beyond wood. Options include:
- Epoxy resin coating for a glossy, durable finish
- Bottle caps arranged in patterns under clear sealant
- Penny countertops for a unique, conversation-starting surface
- Ceramic tiles for a more weather-resistant option
Adding wine glass racks, bottle holders, or custom shelving makes your bar more useful. Weather protection items like a retractable awning or custom cover will help your bar last longer, making your backyard projects more durable through the seasons.
Safety Precautions Before Starting
Starting a DIY wood pallet bar project is all about safety first. It’s not just about the design or materials. Knowing how to prevent injuries is key. Preparing well makes your project fun from start to finish.

Proper Protective Equipment
Quality safety gear is cheaper than treating injuries. Before you start, get these essential items:
- Eye Protection – Safety glasses or goggles protect your eyes from wood chips, dust, and debris.
- Hand Protection – Durable gloves prevent splinters and cuts from rough pallet wood.
- Respiratory Protection – A dust mask or respirator is key when sanding pallets to avoid harmful dust.
- Hearing Protection – Earplugs or earmuffs protect your hearing from loud power tools.
- Appropriate Clothing – Wear a shop apron and closed-toe shoes to protect against dropped tools.
Even experienced woodworkers always wear safety gear. Your protective equipment should be on at all times, not just during “dangerous parts.”
Working with Reclaimed Wood Safely
Reclaimed pallet wood has unique safety challenges. Before using pallets, follow these guidelines:
- Thorough Inspection – Check each pallet for nails, staples, or splinters. Remove or hammer down metal fasteners.
- Check Treatment Markings – Look for stamps on the pallet. Avoid those marked with “MB” (methyl bromide) as it’s harmful.
- Safe Disassembly – Work in a well-ventilated area when taking apart pallets. Use proper techniques to avoid splintering.
- Proper Cleaning – Clean pallets well to remove dirt, debris, and contaminants before use.
If unsure about a pallet’s history or treatment, use it only for non-food contact surfaces. Health safety is more important than saving money.
Tool Safety Guidelines
Power tools make your project faster but need careful handling. Follow these guidelines when using tools on your DIY wood pallet bar:
- Read Instructions – Always read the manufacturer’s guidelines before using any tool, even if you’ve used similar models before.
- Maintain Equipment – Ensure all tools are in good working condition with guards and safety features intact. Never remove safety guards, even for “just one quick cut.”
- Secure Workpieces – When using cutting tools, always clamp your workpiece properly to prevent dangerous movement during cutting.
- Proper Attire – Avoid wearing loose clothing, jewelry, or gloves that could get caught in moving parts, and tie back long hair.
- Power Management – Always unplug tools when changing blades or bits and when not in use to prevent accidental starts.
Keep your work area clean, well-lit, and organized to prevent trips and falls. Have a first aid kit ready for minor injuries. These precautions keep your project safe from start to finish.
Remember, patience is a key safety tool. Rushing through cuts or assembly is when most accidents happen. Take breaks when needed and never work with power tools when tired or distracted. Your DIY wood pallet bar will be enjoyed for years to come—making it safely is worth the extra time.
Selecting and Preparing Your Pallets
Before starting your pallet bar project, you need to pick the right pallets. The quality of your materials affects your bar’s look, feel, and safety. Using old pallets is affordable and adds a special touch that new furniture can’t match.

How to Choose Quality Pallets
Not all pallets are the same. Knowing what to look for can save you trouble later. When searching for pallets, focus on their strength.
Choose pallets with little damage. Avoid those with big cracks, warps, or rot. Heavier pallets usually mean better quality wood that looks and lasts longer.
The best wood for pallet furniture includes:
- Oak – durable and has a nice grain
- Maple – smooth finish and even color
- Pine – lighter and easier to work with, but less durable
Find pallets of the same size to make building easier. Uniform sizes help your bar look professional.
Good places to find quality pallets are:
- Garden centers and nurseries
- Hardware and building supply stores
- Small manufacturing facilities
- Furniture stores and warehouses
Many places give away pallets they don’t need. Building good relationships with store managers can help you get better pallets.
Checking for Pallet Treatment Markings
When upcycling pallets, safety is key. All international shipping pallets are treated to stop pests and diseases. But, some treatments can be harmful at home.
Look for the IPPC stamp on your pallets. This shows how they were treated. The most common codes are:
- HT – Heat-treated pallets are safe for DIY projects as they’ve been kiln-dried to kill pests
- MB – Avoid these! This marking indicates methyl bromide treatment, a toxic pesticide that can leach from the wood
- DB – Debarked pallets are safe and have had the outer bark removed
- KD – Kiln-dried pallets are safe and have been dried in a kiln
Unmarked pallets are risky because you don’t know their treatment history. Domestic pallets, not used for international shipping, are usually safer as they’re often untreated.
If you’re unsure, it’s better to avoid pallets with unknown origins. Your health is more important than saving money on free materials.
Cleaning and Disinfecting Procedures
Cleaning your pallets well is key before turning them into a bar. Follow these steps to prepare them:
- Remove all visible dirt, debris, and hardware using a stiff brush and pry bar
- Inspect for and remove any remaining nails, staples, or metal fragments
- Wash the pallets with warm water and mild dish soap, scrubbing with a brush to remove embedded grime
- For deeper disinfection, create a mixture of one part bleach to three parts water
- Apply the bleach solution using a spray bottle or brush, allowing it to sit for 10-15 minutes
- Rinse thoroughly with clean water to remove all cleaning agents
Let your pallets dry completely in direct sunlight if possible. Sunlight kills bacteria and prevents mold. This step is important—working with damp wood can cause warping and mold issues later.
For tough stains or odors, a pressure washer on a low setting can work. Be careful not to damage the wood by keeping the pressure moderate and some distance from the surface.
Once clean and dry, lightly sand all surfaces to remove any raised grain from washing. This initial sanding makes your final finishing work easier and results in a smoother pallet bar.
Planning Your Bar Design
Planning is key to making a stunning bar from wooden pallets. Before you start, think about your space and style. This will save materials and prevent frustration. Your DIY wood pallet bar will be exactly what you wanted.
Using two pallets made an 8-foot bar that seats four. We considered a U-shaped design but chose something else. Proper planning makes your bar both useful and beautiful.
Determining the Right Size and Height
Getting the right dimensions is important for comfort and function. Commercial bars are usually 42 inches high. For bar-height stools, aim for 42-46 inches. For chairs, 36 inches is better.
The counter should be 16-24 inches deep. This gives enough space for drinks and plates. For width, 24-30 inches per person is best to avoid elbow bumps.

Measure your space carefully before deciding on dimensions. Use painter’s tape to mark the area. This helps you see how the bar will fit and adjust as needed.
For outdoor bars or patio bars, add extra space for movement and weather protection. Consider special features like coolers or sinks and adjust your design.
Bar Layout Options
The layout of your pallet bar is key to its function and fit in your space. Popular designs include:
- Straight Bar – Simple and fits well in narrow spaces.
- L-Shaped Bar – Great for corners, offers more counter space.
- U-Shaped Bar – Provides lots of counter space and a closed serving area.
- Island Bar – Freestanding, perfect for serving groups.
Think about traffic flow when choosing your layout. Ensure there’s enough room for people to move. For outdoor bars, consider proximity to your home for convenience and protection.
If space is tight, consider fold-down or collapsible designs. These are great for small patios or decks.
Creating a Simple Blueprint
A detailed blueprint saves time and materials. Sketch your design on graph paper, with each square representing 6 inches. This helps keep proportions right and lets you see the final project.
Include all dimensions and feature placements on your blueprint. Note the number and position of pallets and any extra lumber. For our bar, we needed six posts for support.
Make both top-down and front elevation drawings. This lets you see your project from different angles and spot issues early. Use digital tools or apps for more precise plans.
Your blueprint should also outline the construction sequence. This prevents problems when assembling parts. Make a detailed materials list to gather everything before starting your woodworking project.
Consider these elements when creating your blueprint:
- Footrest placement (usually 7-8 inches up and 7-8 inches in)
- Storage shelving dimensions and locations
- Electrical considerations for lighting or small appliances
- Drainage solutions for sinks or ice wells
- Overhang for comfortable seating (8-12 inches)
Even if you’re new to blueprints, taking the time to plan will improve your results. The process helps you think through every detail before starting.
With a solid plan, you can confidently build your DIY wood pallet bar. It will become a place for making memories with friends and family for years.
How To Built a DIY Wood Pallet Bar: Step-by-Step Process
Let’s turn raw pallets into a stylish bar. This guide will help you build a pallet bar step by step. It’s a weekend project that’s easy to manage. You’ll need to create a base, build the front, and make a countertop.
Start by preparing a level surface. For outdoor bars, flatten the ground and add pavers. For indoor bars, make sure your floor is clean and level.
Choose your four strongest pallets for the base. Place them according to your plan to form the bar’s front and sides. Use 3-inch deck screws to connect them at the corners. Pre-drill holes to avoid splitting the wood.
Add vertical support posts for extra stability. The sturdier your base, the safer your bar will be. Use 4×4-inch pressure-treated posts for outdoor bars or 2×4-inch lumber for indoor ones.
Secure the posts to the pallets with corner brackets and screws. If your bar is freestanding, add a back panel for more stability. This makes your bar sturdy and prevents wobbling.
For outdoor bars, use ground post anchors to secure the structure. These anchors, like the Ground Master type, make it easy to insert posts into the ground. Tighten with bolts for stability without digging deep holes.
Check if your structure is level. Use shims if it’s not. A level bar base ensures your drinks stay put!
Building the Bar Front
The bar’s front is where you show off your style. Decide if you want an open or closed front. An open front shows the pallet structure, while a closed front looks more finished.
For a closed front, attach pallet boards or 1×6-inch lumber vertically. Cut them to the same height for a uniform look. You can leave gaps for a rustic look or place them flush for a polished look.
Secure the boards with screws from behind for a clean finish. Pre-drill all holes to prevent splitting, mainly near the edges.
Add a footrest 6-8 inches from the ground for comfort. Use a 2×4 board or metal pipe for this. It adds a professional touch to your DIY project.
Make the wood look interesting by alternating board directions or using contrasting wood types. Add decorative molding or trim for a more finished look.
If you like the natural look, leave the pallets unpainted. But, exterior paint adds protection and a cohesive look. Many builders start with natural wood but end up painting for a finished look.
Constructing the Countertop
The countertop is key for both looks and function. You can use pallet boards, a solid piece of wood, or a combination of both. Choose based on your skill and desired look.
For a simple top, use pallet boards side by side. Cut three pallets to fit your bar top. Cut the slats to 14-18 inches deep for most home bars.
Sand the boards well to prevent splinters. Start with coarse sandpaper and move to finer grits until smooth.
Secure the countertop with predrilled holes and galvanized deck screws. Attach from underneath to hide fasteners.
For a refined surface, use a solid piece of project board. Make it weather-resistant with protective coatings.
For outdoor bars, apply outdoor-rated stain and at least 5 coats of exterior polyurethane. This protects against rain, spills, and sun. Allow 24 hours between coats and 72 hours to cure before use.
Fill gaps with wood filler and sand again. For extra durability, apply epoxy resin for a waterproof surface.
The countertop edge should overhang slightly for armrests. Sand this edge well to prevent splinters.
With your countertop done, you’ve built the main parts of your DIY wood pallet bar! Now, add storage, decorations, and finishing touches to make it yours.
Building a pallet bar is flexible. Adapt these steps to fit your space, materials, and design. DIY pallet furniture tells a story through the wood and your craftsmanship.
Adding Storage Features to Your Bar
Now that your basic bar structure is complete, it’s time to add custom storage features. A true bar needs spaces for bottles, glassware, and bar tools. These additions will turn your pallet furniture project into a fully functional entertainment station.
Building Shelves for Bottles
Bottle shelving is key for any home bar. Think about how easy it is to serve and how your collection looks.
Standard liquor bottles are about 12 inches tall. So, plan your shelf heights with at least 14 inches of clearance. This makes it easy to remove and pour bottles. Secure pallet boards horizontally along the back wall of your bar, supported by brackets or wooden cleats.
For a more sophisticated look, create tiered shelving. This shows off bottles at different heights. It also maximizes storage space and adds visual interest to your rustic home decor.
- Install a small lip (1-2 inches high) at the front edge of each shelf to prevent bottles from sliding off
- Add LED strip lighting beneath shelves to illuminate bottles from below for an upscale ambiance
- For outdoor bars, angle shelves slightly backward to prevent bottles from sliding forward in windy conditions
- Space shelves at varying heights to accommodate different bottle sizes
If you have children, consider a locking cabinet for alcohol storage. This keeps things safe and stylish.
Creating a Glass Rack
A glass rack is both practical and stylish. It keeps stemware clean and safe from dust. The most popular design suspends glasses by their bases from a rack mounted under a shelf or directly to the bar structure.
To build a basic hanging glass rack, start with a piece of 1×4 lumber cut to your desired length. Mark evenly spaced points for glass placement, allowing 3-4 inches between wine glasses and 2-3 inches between standard tumblers.
Install T-molding or wooden strips with a groove along these marks. These channels create secure slots where glass stems can slide in and hang safely. Mount this assembly to the underside of a shelf using screws, ensuring it’s level and firmly attached.
For a look that matches your woodworking ideas, consider these options:
- Use reclaimed pallet wood for the rack base, but sand thoroughly to prevent snagging delicate stemware
- Stain the glass rack to match your bar’s finish for a cohesive appearance
- Add small wooden dividers between glass positions for extra stability
If hanging glasses doesn’t suit your style, build cubbies or compartments within your bar structure. This is great for outdoor backyard projects where wind might be a concern.
Installing Cabinet Space
Enclosed cabinet space provides valuable storage for bar tools, mixers, and less frequently used items. It keeps these essentials protected from dust and weather while maintaining a clean, uncluttered appearance.
To add basic cabinet space beneath your countertop, start by framing out the area with 2×2s or 2×4s. Then, attach pallet boards or plywood to this frame to form the sides and back of the cabinet.
For cabinet doors, repurpose the flat sides of pallets or cut plywood to size. Attach these panels with hinges for easy access. Consider these functional enhancements:
- Add adjustable shelf pins inside the cabinet for flexible organization as your needs change
- Install simple handles or knobs that complement your bar’s rustic aesthetic
- For outdoor bars, add secure latches to prevent doors from swinging open in the wind
- Consider weather stripping around door edges for additional protection against moisture
For indoor bars, add specialized storage features like a pull-out cutting board for garnish preparation or a dedicated ice bucket holder. These thoughtful additions elevate your DIY bar plans from basic to professional quality.
When designing your cabinet space, keep the rustic charm of your pallet bar. Use consistent materials and finishes. Rough-hewn wood with visible grain patterns enhances the authentic character of your pallet furniture while providing practical storage solutions.
Sanding and Finishing Your Pallet Bar
Now that your pallet bar is built, it’s time to finish it. This step makes it look good and last long. A smooth DIY wood pallet bar is safe and inviting for guests.
Proper Sanding Techniques
Sanding is key for a nice finish on reclaimed wood crafts. Start with coarse-grit sandpaper to smooth out the wood. This removes splinters and old paint.
Sand in the wood grain direction to avoid scratches. Use a three-step process for best results:
- Start with coarse-grit (60-80) for initial smoothing
- Then, use medium-grit (120-150) for more refinement
- Finish with fine-grit (220) for hands-on surfaces
An orbital sander helps with big areas, but hand-sand corners and edges. Make sure the bar top and edges are smooth for safety.
After each sanding, vacuum and wipe with a tack cloth to remove dust. This prevents staining issues. Wear a dust mask to protect your lungs.
Staining Options for Pallet Wood
Staining brings out the wood’s natural beauty and adds color. Pallet wood’s different species create a unique look. This adds charm to your bar.
Before staining, clean and dry your bar. Use a pre-stain conditioner on pine pallets to avoid blotches. Let it soak for 15 minutes before wiping off.
Choose a stain color that fits your style. Here are some popular options:
- Dark walnut or mahogany – Sophisticated look
- Medium oak or cherry – Warm, traditional feel
- Weathered oak or driftwood – Great for coastal or farmhouse styles
- Whitewash – Bright, modern look
Test your stain on scrap wood first. Apply it with a brush or cloth, following the grain. Let it sit 5-15 minutes, then wipe off excess.
For deeper color, apply more coats instead of letting one sit longer. Most patio bar projects need two to three coats. Wait 24 hours between coats for the best finish.
Applying Protective Sealants
Sealing your bar is the last step. It keeps it durable and safe. Choose the right sealant based on your bar’s location.
For an outdoor bar, use marine-grade polyurethane or exterior spar urethane. These protect against sun, rain, and temperature changes. Apply at least three coats, sanding lightly between applications.
For indoor bars, standard polyurethane works well. Water-based polyurethane dries faster and has less smell. Oil-based versions are more durable and warm.
The countertop needs extra care. Consider these options:
- Polyurethane – Good all-around protection
- Epoxy resin – Thick, waterproof surface
- Food-safe finishes – Essential for food preparation
Work in a dust-free area with good ventilation when applying sealant. Use a high-quality brush to avoid bubbles. Apply thin coats for even drying.
Wait 24 hours between coats as instructed by the manufacturer. The final coat should cure for at least 72 hours before use.
With proper sanding and finishing, your DIY wood pallet bar will look great and last long. It’s perfect for your patio or indoor entertainment area.
Troubleshooting Common Issues
Building a DIY wood pallet bar can be tricky. Knowing how to fix common problems is key. Most issues have simple solutions that don’t mean starting over. Let’s look at how to tackle the most common problems in your pallet furniture project.
Fixing Wobbly Structures
A wobbly bar can be a safety hazard. If your pallet bar is unstable, don’t worry. This is a common issue that’s easy to fix.
First, check if all four corners touch the ground. Uneven floors or surfaces often cause wobbling. For outdoor bars, add soil, sand, or pavers to level it. For indoor bars, use wooden shims to stabilize it.
If the wobble is due to weak joints, add more hardware. L-brackets or corner braces can make it sturdier. For longer bars, add diagonal bracing to reduce movement.
Taller bars might need to be anchored to a wall or weighted. Outdoor bars in soft soil or windy areas should use ground anchors or concrete footings. Fixing wobbles now prevents spills and safety issues later.
Dealing with Uneven Surfaces
Pallet wood has natural unevenness, which can be a problem on countertops. These imperfections add charm but can affect use.
For small unevenness, use a belt sander with coarse-grit paper. Start with 60-80 grit to level high spots. Check often with a straight edge to avoid over-sanding.
For bigger unevenness, a hand planer can help. Once fixed, use finer sandpaper (120, 180, then 220 grit) for a smooth finish.
For low spots, use stainable wood filler. Apply it slightly higher, then sand it down after drying. For severe unevenness, apply self-leveling epoxy for a waterproof surface.
If unevenness is in the structure, use adjustable furniture levelers. These small additions can adjust height for uneven floors without changing your project.
Addressing Wood Splitting Problems
Wood splitting is a common problem with pallet material. Uneven drying or past stress can cause cracking during your project.
Stop immediately if you see splitting. For small splits, apply wood glue and clamp until dry. The bond will often be stronger than the wood.
To prevent splitting, predrill holes before screwing. Use drill bits smaller than your screws to avoid splitting wood fibers.
For large splits, use dowels or biscuits to reinforce. This repairs the split and prevents it from getting worse. For structural splits, it’s best to replace the board.
If splits happen after assembly, check if they’re cosmetic or structural. Cosmetic splits can be filled with wood putty. For decorative cracks, use tinted epoxy.
To prevent future splitting, seal all wood, including cut ends. This prevents moisture absorption and extends your pallet furniture’s life.
Customizing Your Wood Pallet Bar
Customizing your DIY wood pallet bar lets your personal style shine. After building the basic structure, you have a blank canvas. This is where you add creative touches that make your bar stand out.
Think of it as a chance to create a unique piece of rustic home decor. It will reflect your personality and enhance your space.
Adding Decorative Elements
Decorative elements can turn your bar into a conversation starter. Choose a theme that fits your decor or creates the vibe you want. A nautical theme is great for a relaxed coastal feel, perfect for summer.
Try rope wrapping around support posts for texture and to hide wood imperfections. This simple trick adds a lot of visual interest to your outdoor bar.
Custom signs make your bar truly yours. Use reclaimed wood and paint pens for a personal touch. Look for interesting wood pieces at yard sales or flea markets to add your bar’s name or a fun slogan.
Hardware choices also impact your bar’s look. Consider these options:
- Antique-style hinges and handles for cabinet doors
- Industrial pipe fittings as towel bars or footrests
- Decorative brackets supporting shelves
- Bottle openers mounted in convenient locations
Natural elements add texture and interest. Stone veneer, copper accents, or bamboo details can enhance your design. Choose elements that work well together, not against each other.
Lighting Installation Ideas
Good lighting turns your pallet bar into a night-time hotspot. The right mix of ambient and task lighting is key. This ensures your bar is inviting during the day and functional at night.
String lights create a warm atmosphere, perfect for entertaining. Hang them along the roof, wrap them around posts, or create a canopy. Use weather-resistant zip ties to secure lights and cords.
For task lighting, consider these options:
| Lighting Type | Best Location | Power Source | Weather Resistance | Installation Difficulty |
|---|---|---|---|---|
| LED Strip Lights | Under shelving or bar overhang | Electric or battery | Available in waterproof versions | Easy |
| Solar Pendant Lights | Hanging from pergola or roof | Solar panel | Excellent | Moderate |
| Nautical Sconces | Bar front or support posts | Electric | Varies by model | Moderate |
| Uplighting | Through pallet slats | Electric or battery | Requires protection | Easy |
Safety is key when adding lighting. Use outdoor-rated wiring and weather-resistant junction boxes. For permanent setups, consider an electrician to ensure safety codes are met.
Personalizing Your Bar Top
Your bar top is the centerpiece of your project. It’s a chance to get creative and make it unique. The surface should be both beautiful and durable, able to handle drinks and weather.
A herringbone pattern adds visual interest. Use wood pieces about 11 x 1½ x ⅝ inches for this design. Adjust the pattern for curved sections to keep the design flowing.
Epoxy finishes protect and add creativity. Clear epoxy is great for outdoor use. Try these epoxy techniques for artistic designs:
- River tables with colored epoxy flowing between wood pieces
- Embedded items like bottle caps, coins, or seashells
- Glow-in-the-dark epoxy for dramatic nighttime effects
- Marbled or geode-inspired colored epoxy designs
Wood burning (pyrography) lets you add custom designs. Create logos, quotes, or patterns on the wood before sealing. This adds a handcrafted touch to your rustic home decor project.
Protect your work with sealants. Marine-grade polyurethane or epoxy is best for outdoor bars. Apply thin coats for durability and appearance.
Your bar top is where memories are made. The effort you put into it makes it special. Let your creativity guide you as you finish your unique DIY wood pallet bar.
Weatherproofing for Outdoor Use
Outdoor pallet bars face many challenges from the weather. Rain, sun, snow, and changing temperatures can harm unprotected wood. But, with the right protection, your bar can last for years.
Weather-Resistant Finishes
The right finish is key to protecting your pallet bar. It depends on where you’ll place it.
For outdoor bars, start with a exterior wood sealer. This goes deep into the wood. Then, apply marine-grade spar urethane to fight UV damage and water.
Use at least three coats of finish. Let each coat dry fully before adding more. This makes your bar last longer.
- For countertops: Use food-safe finishes that withstand frequent cleaning
- For structural elements: Apply heavy-duty protection like exterior polyurethane
- For humid climates: Choose products with mildew-resistant properties
- For areas with harsh winters: Select finishes with freeze-thaw stability
Darker stains get hotter in the sun, causing wood to expand and contract. Lighter finishes reflect heat but show dirt more. For indoor bars, standard water-resistant finishes work well.
Protective Covers and Maintenance
A good cover can make your pallet bar last longer. It’s like an insurance policy for your project.
Use a custom cover made from marine-grade canvas or heavy-duty vinyl. Look for reinforced corners and ventilation to prevent moisture buildup.
If a custom cover is too expensive, modify a patio furniture cover or make one from waterproof tarpaulin. Make sure it covers your bar well and allows airflow.
Keep your bar in good shape with regular maintenance:
- Check quarterly for loose fasteners, early signs of rot, or finish deterioration
- Clean surfaces regularly with mild soap solution, avoiding harsh chemicals
- Allow wood to dry completely before covering
- Address small cracks in the finish immediately—sand lightly and reseal
- Keep the area around your bar clear of leaves and debris that trap moisture
When water no longer beads on the surface, it’s time for a new coat of sealant. For most bars, this means reapplying every year, usually in spring.
Seasonal Care Tips
Different seasons bring different challenges for your outdoor pallet bar. Adapting your care routine ensures it lasts longer and stays enjoyable.
Spring Preparation: Clean your bar thoroughly after winter. Check for damage and apply a new coat of sealant before summer starts.
Summer Protection: UV rays can cause fading and drying. Add shade with a pergola or umbrella. Clean spills quickly to prevent mildew.
Fall Maintenance: Remove leaves to prevent moisture buildup. Fall is also a good time to tighten loose hardware.
Winter Precautions: Move smaller bars to protected areas in freezing temperatures. For permanent installations, ensure proper drainage and remove snow from the countertop.
Before winter, do a deep clean and inspection. Apply touch-up sealant and cover your bar securely. Check under the cover in snowy areas to prevent ice damage.
With the right weatherproofing and care, your pallet bar can be a lasting part of your outdoor space. The effort you put in will pay off, letting you enjoy it for many seasons.
Conclusion
You now have all the info to make a fantastic bar from wood pallets. This DIY project is a mix of creativity, usefulness, and being green. Your pallet furniture will be the highlight of any party for years.
Your pallet bar can grow with you. Begin with the basic plan we showed, then add your own touches. Pallets are great because each one has its own story in its grain and marks.
Don’t hurry. Choose good pallets, plan well, and enjoy the build. There’s nothing like serving your first drink at a bar you made yourself.
Your pallet bar is more than furniture. It’s a place for friends to meet, a spot for stories, and proof of your skill. It can turn any room into a special place for fun.
Are you ready to build? Get your stuff, pick a weekend, and start making your pallet bar. You’ll learn new skills, impress your friends, save money, and add a unique touch to your home.
## FAQ
### Q: How many pallets do I need to build a basic bar?
A: For a standard bar, you’ll need 8-10 pallets in good shape. This includes pallets for the base, front, countertop, and shelves. Having a few extra pallets is wise, in case some are damaged.
### Q: How can I tell if pallets are safe to use for my bar?
A: Look for “HT” marked pallets, which are safe. Avoid “MB” marked ones, as they have harmful chemicals. Unmarked pallets are risky. Check for signs of chemicals, mold, or dirt that might mean they’re not safe.
### Q: What’s the standard height for a pallet bar?
A: A bar counter for standing should be 42 inches high. For bar stools, aim for 42-46 inches. For chair seating, use a 36-inch counter. Measure from the floor to the top of your countertop.
### Q: Do I need special tools to build a pallet bar?
A: You don’t need fancy tools, but the right ones help a lot. You’ll need a drill, circular saw, sander, hammer, and safety gear. Optional tools include a jigsaw, miter saw, clamps, and a nail gun.
### Q: How do I clean pallets before using them?
A: Start by brushing off dirt. Then, wash with warm water and mild soap. For tough stains, use a bleach solution, then rinse well. Let them dry in the sun before sanding.
### Q: What’s the best finish for an outdoor pallet bar?
A: Use a wood sealer as a base coat, then apply three coats of marine-grade urethane. This protects against moisture and sun. Reapply urethane yearly to keep it protected.
### Q: How can I prevent my pallet bar from wobbling?
A: Make sure all corners touch the ground. Use shims if needed. Reinforce corners with screws and metal brackets. Add diagonal bracing for longer bars. For outdoor use, consider anchors or footings.
### Q: Can I add electrical features to my pallet bar?
A: Yes, you can add lights, small fridges, or more. Use outdoor-rated fixtures for safety. Solar options are good for outdoor bars. For complex setups, get a licensed electrician’s help.
### Q: How long will a pallet bar last outdoors?
A: With care, an outdoor pallet bar can last 5-10 years. Climate, weatherproofing, and maintenance affect its life. Regular checks and refinishing can extend its life.
### Q: What are some creative ways to customize my bar top?
A: You can use contrasting wood, epoxy, or wood burning for designs. Try decoupage, stencils, or arranging boards in patterns. Make sure to seal any customizations.
### Q: How do I create a smooth countertop from rough pallet wood?
A: Choose the smoothest boards for your top. Sand with 80, 120, and 220-grit sandpaper. Fill gaps with wood filler and sand again. Apply thin polyurethane coats for a smooth finish. Epoxy resin can make it glass-like.
### Q: What’s the approximate cost to build a pallet bar?
A: Free pallets can make a basic bar for $100-200. Costs rise with custom features. A DIY bar can cost $300-500, less than commercial ones.
### Q: How do I protect my outdoor pallet bar during winter?
A: Move small bars to garages or sheds in cold weather. Use a waterproof cover for permanent bars. Ensure drainage and remove snow from the top. Seal the bar before winter.
### Q: Can I incorporate a sink or cooler into my pallet bar?
A: Yes, you can add sinks and coolers. For coolers, make a recessed area. For sinks, plan for plumbing and drainage, possibly needing a pro.
### Q: How do I attach the countertop securely to the pallet structure?
A: First, make sure the base is level. Use 2x4s or plywood for support. Predrill holes and screw the countertop down. Add bracing for heavy tops.
Leave a Reply